Viral Labubu Cake Recipe
… Learn more
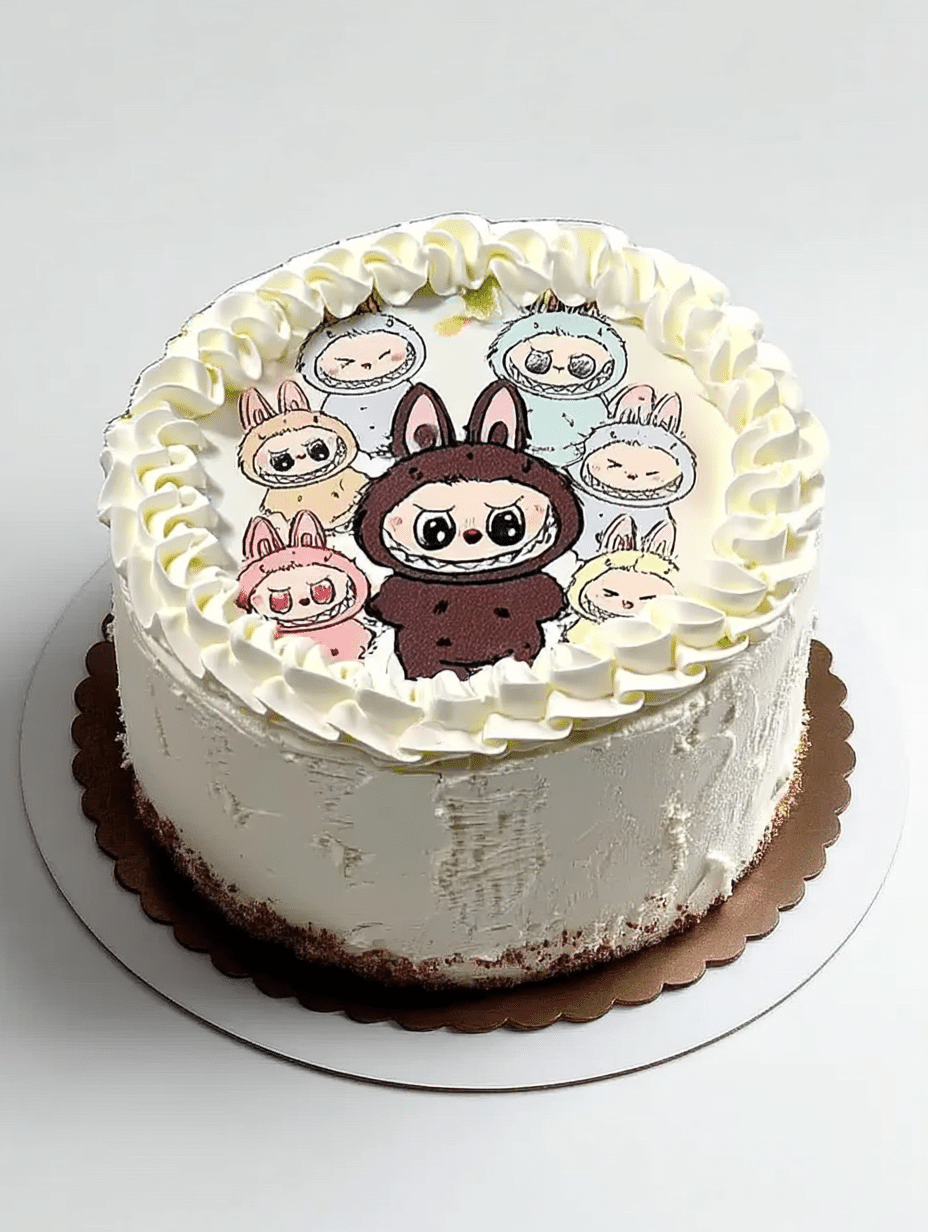
Looking for the next viral dessert trend to wow your friends or celebrate a birthday? The Labubu cake, inspired by the mischievous Pop Mart toy, has taken over TikTok and dessert feeds with its adorable look, fluffy layers, and irresistible taste. This article is your go-to guide: learn how to bake, decorate, and pipe a Labubu cake step-by-step, even if you’re a baking beginner! Dive in for ingredient tips, buttercream secrets, and creative ideas to make your own cake decorated to look like this cute monster. Plus, you’ll discover why this themed cake is stealing the show for every birthday and dessert table.
What You’ll Learn in This Guide:
- The story and trend behind Labubu cakes
- How to bake, layer, and decorate your own viral Labubu cake
- Pro decorating tips, printable toppers, and creative design ideas
- Where to buy ready-made Labubu cakes (Baskin-Robbins, online, local shops)
- How to make it gluten-free, kid-friendly, and Instagram-ready
The Popmart Story: Who is Labubu?
Labubu is a beloved character from Popmart’s “The Monsters” collection, known for its playful grin and big ears. This quirky toy quickly became a favorite among collectors in Asia. When bakers started recreating Labubu in cake form, the trend went viral on TikTok and Instagram, making Labubu cakes a must-have for themed birthdays and anyone obsessed with cute, kawaii desserts.
Table of Contents
Labubu Cake Recipe: What You’ll Need to Get Started
Essential Ingredients for a Labubu Cake
To make your own labubu cake, you’ll want to gather classic cake ingredients—flour, sugar, milk, eggs, and vanilla extract—along with a few extras for decorating. Here’s a basic list:
| Ingredient | Quantity | Purpose |
|---|---|---|
| All-purpose flour | 2 cups | Cake base |
| Sugar | 1.5 cups | Sweetness, structure |
| Milk | 1 cup | Moisture, softness |
| Eggs | 3 large | Structure, richness |
| Vanilla extract | 1 Tbsp | Flavor |
| Butter | 1 cup (softened) | For cake & buttercream |
| Baking powder | 2 tsp | Lift and fluffiness |
| Powdered sugar | 2 cups | Buttercream frosting |
| Cornstarch | 2 Tbsp | Light texture in cake recipe |
| Food coloring | Gel or liquid | Labubu’s signature look |
| Fondant (optional) | As needed | Ears, sharp teeth, small details |
This recipe is easy enough for beginners, but versatile for creative pros.
Special Tools for Baking and Decorating
Themed cakes like this are all about the details. Grab these tools for success:
8-inch cake pan (or similar size)
Stand mixer or hand mixer for a smooth cake batter
Spatula for folding and smoothing
Piping bag with a grass tip and small round tip for features
Offset spatula for spreading buttercream
Cake turntable (optional, but helpful for decorating)
Small sharp knife for detail work
If you want your labubu cake to really shine, using a piping bag for the ears and grin, and grass tip for texture, is a game-changer. Check out our full cake decorating tool guide for more pro tips.
How to Make a Labubu Cake: Step-by-Step Guide
Preparing the Fluffy Cake Base
The foundation of any good labubu cake is a moist, fluffy cake base. Many bakers opt for a chiffon or classic sponge cake for that light, airy texture. Here’s a simple step-by-step:
- Preheat your oven to 350°F (175°C) and grease your 8-inch cake pan.
- Whisk together flour, cornstarch, baking powder, and a pinch of salt.
- In another bowl, cream the butter and sugar until light and fluffy.
- Add eggs one at a time, mixing after each addition. Stir in vanilla extract.
- Alternately, add the dry mix and milk, starting and ending with flour.
- Pour into your prepared pan and smooth the top.
- Bake for 25–30 minutes, or until a toothpick comes out clean.
Let the cake cool completely before moving on. Want to make a chocolate version? Swap 1/4 cup of flour for cocoa powder and add a dash more sugar for a decadent twist.
Pro Tip:
Always freeze your cake after applying the first layer of buttercream (“crumb coat”) for at least 20 minutes. This helps achieve a smooth finish for final decorating.
Mixing and Coloring Buttercream for Decorating
Buttercream is key for the labubu cake’s signature look. Here’s a basic buttercream recipe:
- Beat 1 cup softened butter until smooth.
- Gradually add 2 cups of powdered sugar, mixing well.
- Mix in 2–3 Tbsp milk, a splash of vanilla extract, and a pinch of salt.
- Divide the buttercream into bowls for coloring—brown, white, and pink are musts for Labubu.
- Tint each portion with food coloring until you reach your desired shades.
Use a spatula to fill your piping bag and get ready to decorate! Remember, for the best results, keep your buttercream at room temperature.
Common Mistake to Avoid:
Don’t add too much food coloring at once. Add a little at a time until you get the perfect Labubu shades.
Viral Cake Decorating Tips: From Piping to Fondant
How to Pipe Labubu’s Ears, Grin, and Sharp Teeth
The heart of the labubu cake recipe is in the details—especially the features that make the toy so recognizable.
Ears: Use a piping bag with a grass tip to pipe upright ears directly on top of the cake. You can also use fondant shaped by hand for extra structure.
Grin: Fill a piping bag with white buttercream and use a small round tip to pipe Labubu’s iconic, toothy grin.
Sharp teeth: For those mischievous sharp teeth, you can pipe small triangles of white or mold them from fondant.
Texture: Use quick, upward motions with your piping tip to mimic the fluffy look of Labubu’s fur.
Don’t stress if your cake isn’t perfect—every Labubu cake is unique, and a little “monster” charm makes each one special.
Using Food Coloring and Fondant for Toy-Like Features
To truly mimic the Pop Mart character, you’ll need bold, vibrant food coloring and perhaps some fondant:
Brown gel coloring for the “fur”
White and pink for details
Fondant can be used for sharp features like teeth, eyes, and even tiny claws
For extra shine, a light brush of edible glitter or shimmer dust brings your creation to life
A tip: Start with a little coloring and add more as needed. Themed cakes are all about creativity, so don’t be afraid to experiment!
Building Layers: Assembling and Freezing Your Labubu Cake
How to Layer and Freeze Your Cake for Smooth Decorating
Want bakery-level results? Building a great labubu cake is all about the layers and the freeze. Here’s how:
- Slice your cake into even layers with a sharp knife or cake leveler.
- Spread buttercream between each layer for flavor and structure.
- Apply a thin “crumb coat” of buttercream over the entire cake to seal in crumbs.
- Freeze the cake for 20–30 minutes—this sets the layers and makes final decorating much smoother.
- Finish with a thick, smooth layer of buttercream, using an offset spatula for best results.
This step-by-step process ensures every bite is perfectly fluffy, with a creamy, dreamy texture.
Getting That Perfect Texture in Every Bite
The goal? A labubu cake that’s soft, moist, and packed with flavor. Cornstarch in the cake batter creates a lighter crumb, while freezing the layers before final decorating helps maintain the structure. For added sweetness, some bakers add a thin layer of strawberry or chocolate jam between the cake and cream. If you’re making this as a birthday cake, consider sprinkling in some colorful candy pieces for a fun surprise in every slice!